If you’re new to cutting the cord, getting started with a live TV streaming service like YouTube TV may seem overwhelming.
It doesn’t have to be!
In this beginner’s guide, you’ll learn how to navigate YouTube TV’s home screen, live guide and library. Plus, I’ll share some account settings that you need to know.
Here’s what you need to use this guide:
- A YouTube TV account
- A TV set
- An internet connection
- A supported streaming device
In the video below, I demonstrate how to use YouTube TV with a Roku Ultra streaming device. However, this tutorial will still be useful if you’re using another device to stream.
Table of Contents:
- Signing In
- Navigation Basics
- Home Screen
- Live Guide
- Playback Options
- Library (Cloud DVR)
- Account Settings
- Contact Support
Signing In
You can access YouTube TV from your TV set, a web browser or the mobile app.
From your TV set, which is what we’ll focus on in this article, search for the YouTube TV app if it’s not already installed. Please note: the YouTube TV app is separate from the regular YouTube app.
When you launch the YouTube TV app for the first time, you should see a screen that looks like this:
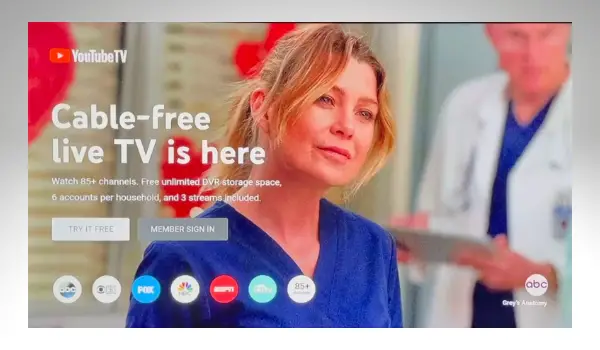
If you’ve already signed up directly at tv.youtube.com, select member sign-in and choose from one of the options on your screen.
To sign in from a web browser:
- Go to tv.youtube.com/start
- Enter the code on your TV screen
- Sign in to your Google account
To sign in with your phone, download and open the YouTube TV mobile app.
And as long as your phone is connected to the same Wi-Fi as your TV set, you’ll be able to select your Google account and sign in.
Navigation Basics
The next few sections of this article will help you learn your way around YouTube TV from a TV set.
When you sign in to YouTube TV for the first time, you’ll see multiple screens to help personalize your experience.
You can select your favorite news shows, movies, TV series and even sports teams.
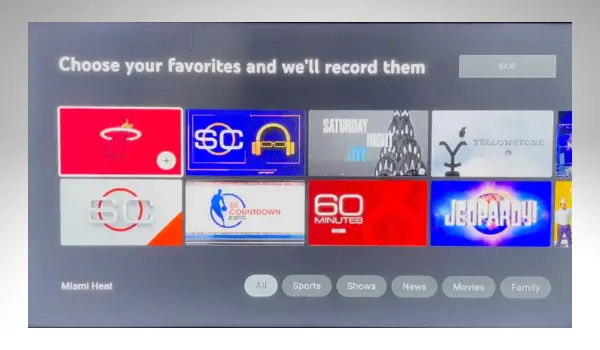
After this initial personalization, you’ll be taken to a home screen every time that you load YouTube TV. It’s one of three main sections to explore:
- Home
- Library (Cloud DVR)
- Live Guide
Home Screen
Home is the default screen that you see when you first open YouTube TV. There is no way to launch YouTube TV and go directly to a specific channel or the live guide.
I don’t spend much time on the home screen unless I’m not sure what I want to watch and need some ideas.
Home Screen Need to Know:
- Top Picks For You are at the top of the screen
- Resume Watching shows you already started
- Shortcuts to live and on-demand news and sports programs
- Access optional add-on channels
- Add content to your library (cloud DVR)
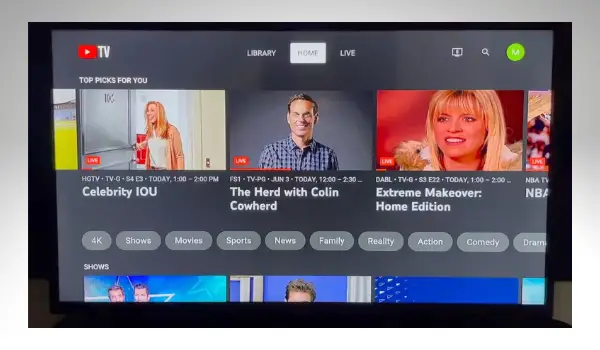
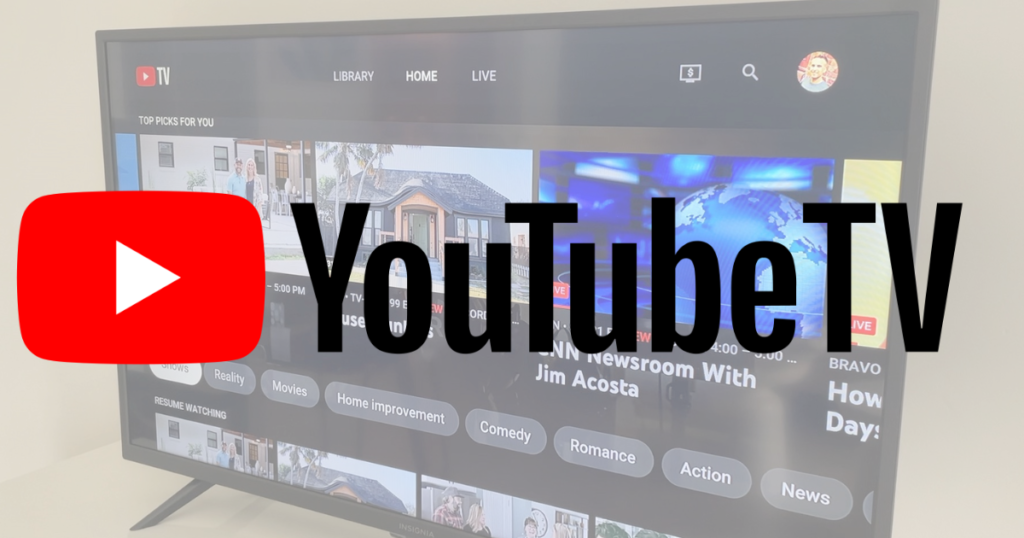
At the top of the home screen, your Top Picks are highlighted. These recommendations will improve over time as you use the service.
Below this, you’ll find filters for various types of programs like movies, sports and news.
Next, click down for the Resume Watching section. This area features live programs and on-demand content that you’ve already started watching.
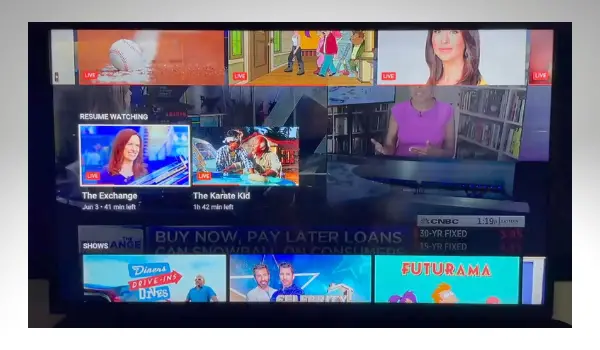
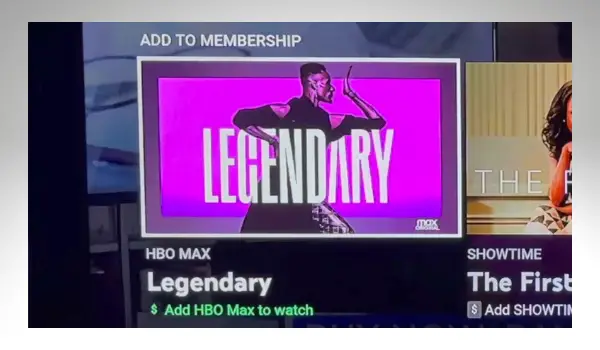
Keep scrolling down for various types of content. You’ll see a section where you can add additional channels to your subscription. They’re optional and require an extra fee.
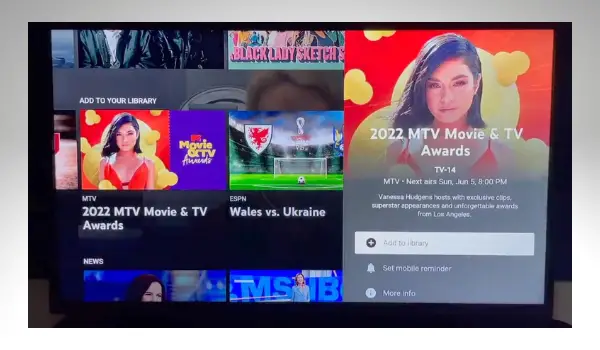
Further down, you can find programs to add to your library (cloud DVR).
How to record: To add content to your library from the home screen, simply click on a program you want to record and select the plus symbol or “Add to library” option.
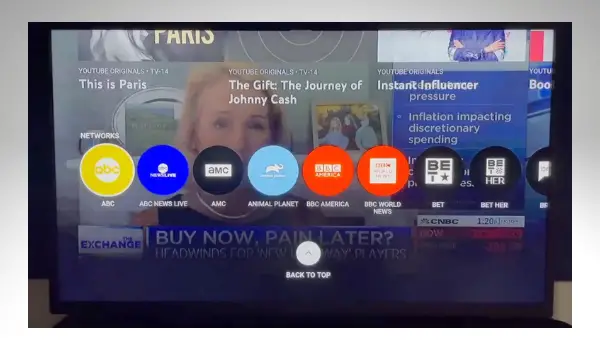
Toward the very bottom of the home screen, you’ll find an alphabetized list of networks. However, I think it’s easier to access channels from the guide.
Live Guide
YouTube TV has gradually updated its live guide over the years to provide a more cable-like look and feel.
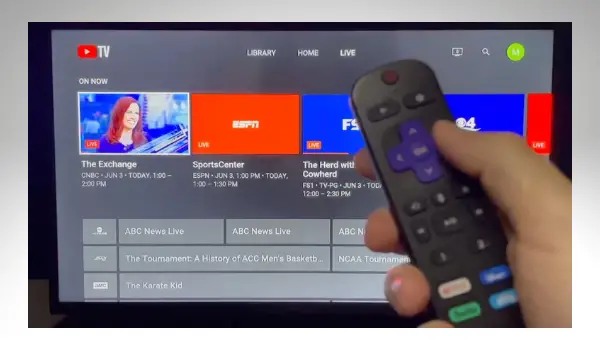
At the top of your screen, you’ll see a collection of programs that are airing right now.
As you scroll through the ON NOW section, the channel logos change to thumbnails of particular shows. There’s also a LIVE bug in the lower left corner of thumbnails.
Below the thumbnail graphic for each show, you see the name of the show, the network that it’s on and the time it airs.
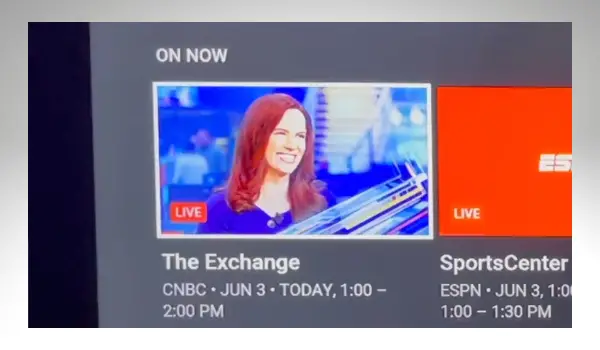
Make your way to the main part of the guide, which is below the ON NOW section.
As you scroll down through the channels, a brief description of the highlighted show appears at the top of the screen.
Find something you want to watch? Press OK on your Roku remote and you’ll be taken directly to it.
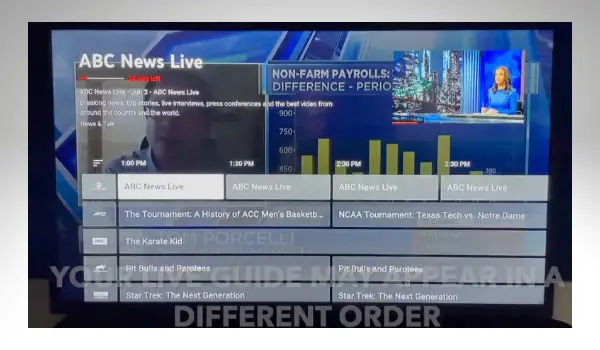
Live Guide Tips:
- See what’s airing right now
- Click OK to watch shows currently airing
- To preview shows coming up later, arrow to the right
- To return to the guide from a show, click back
To return to the guide from live TV, press BACK once on your Roku remote. This will bring you to the section of the guide where you left off.
If you want to go to the top of the guide quickly, simply click BACK a second time.
The last channel that you watched will continue to play in the background as you navigate the live guide.
Live Guide FAQ
- How do I see what’s airing later? Scroll to the right of the guide. There is no jump to day feature.
- How do I see what’s airing on a specific network? Arrow to the left of the guide and highlight a channel logo. Press OK on a channel logo. Then you can see content from that network only.
- How can I change how the channels are sorted on the guide? Look for the three horizontal lines above the network logos. Click on this to reorder the guide.
There are a few of ways to personalize the live guide:
- Most watched
- Alphabetical order (A-Z)
- Z-A order
- Custom
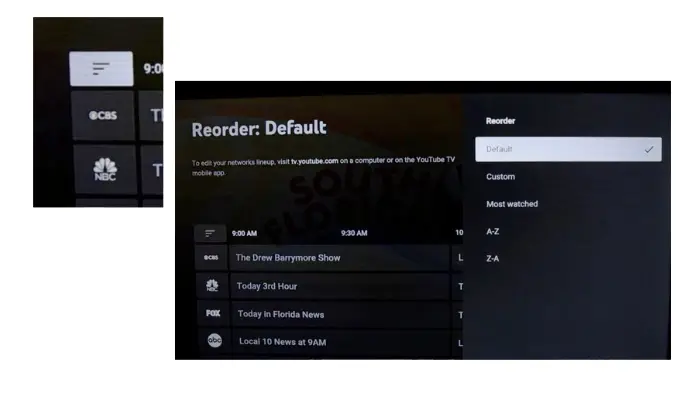
- How do I create a custom guide to see only the channels I watch? To create or edit your custom guide, log in to YouTube TV from a computer or the mobile app.
See my separate tutorial to customize the YouTube TV live guide.
Playback Options
When you’re watching live TV, there are several playback options you need to know about.
Click down once on your remote to see information about the program you’re currently watching, as well as the timeline. You can pause, rewind and fast-forward using your remote.
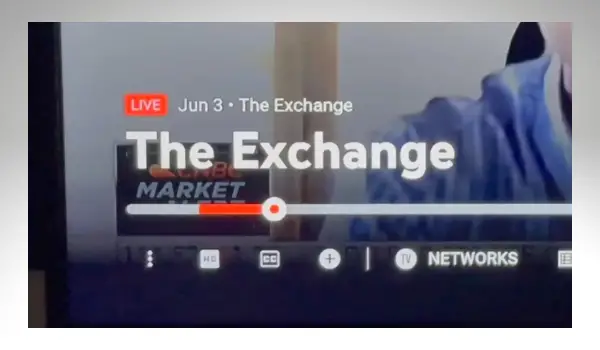
Arrow down a second time to reveal additional options.
Let’s start on the left with the three dots. Here you will find audio options, auto-pause, send feedback and stats for nerds.
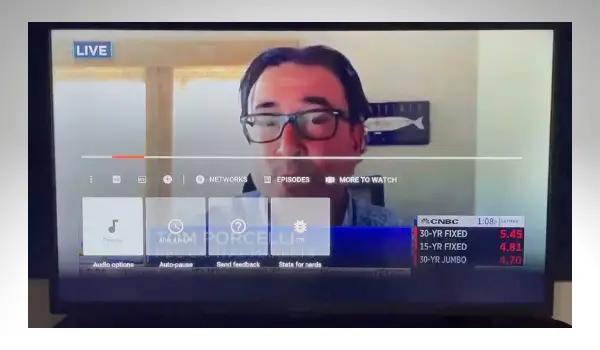
The next section is for video quality. I usually keep mine on auto. Next to that is closed captioning to turn on subtitles.
And, to the right of that, is a plus symbol. When you click on that, you’ll have the option to add the program you’re watching to your library.
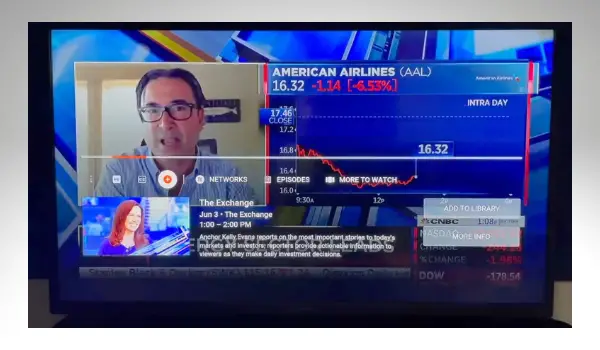
Next, you’ll see networks. When this is highlighted, click down to scroll through the mini guide. This allows you to channel surf without leaving the show you’re watching.
The last channel you were watching appears in the first position of the mini guide.
Note: In December 2023, YouTube TV began rolling out a new shortcut to let you switch between the last two channels. Press and hold the OK or Select button to return to the last channel.
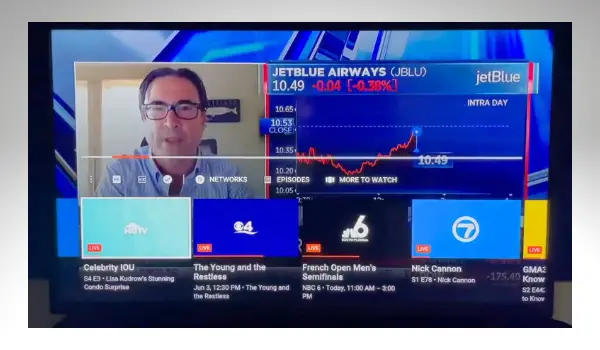
Highlight the Episodes tab to view upcoming programming.
Finally, select More to Watch and you’ll find a mix of live and on-demand programming that relates to the program you’re currently watching.
Library
Looking for the DVR? Head to YouTube TV’s Library section. Users get unlimited cloud DVR storage, and recordings are saved for up to nine months.
If you set a recording, you can fast-forward through commercials when you go back to watch it.
Library Need to Know:
- Redesigned Library shows category tabs along the top of a TV screen
- Shows you record are located in the library
- Add shows to your DVR from either the home screen or live guide
- Use the search function to locate shows to record quickly
- To skip ads, always select DVR (not VOD)
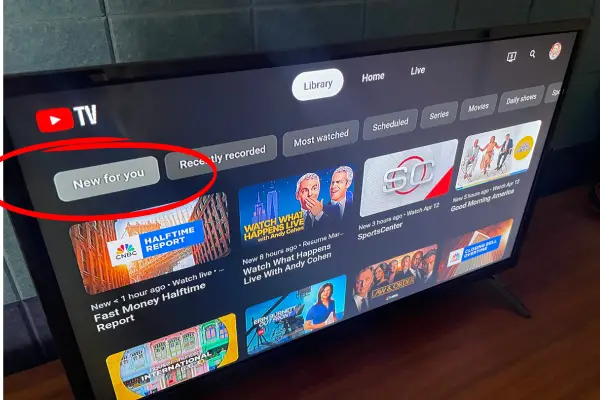
You can add programs to your library from the home screen or live guide by clicking on the plus symbol as described in previous sections.
But if you know exactly what you want to record, the search feature may be faster.
Just follow these steps:
- Arrow up to the top of the screen
- Scroll to the right
- Press OK on the magnifying glass
- Type in the program, event or sports team/league you want
- Make a selection from the search results
- Add it to your library by clicking the plus sign
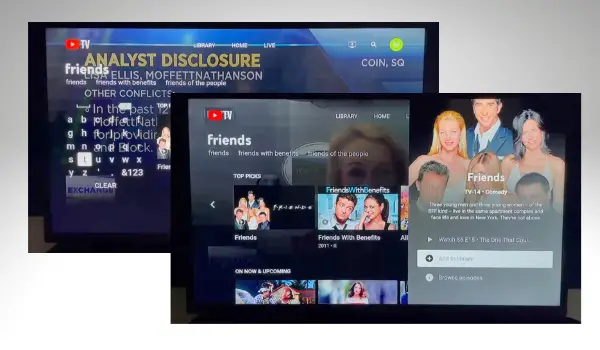
When you add a show to your library, all episodes in the series will be recorded. There is no option to record only a single episode in a series.
For sports recordings, there are more options. For example, you can search specific teams and record an individual game or all games. You can also record by league.
Watching Library Recordings
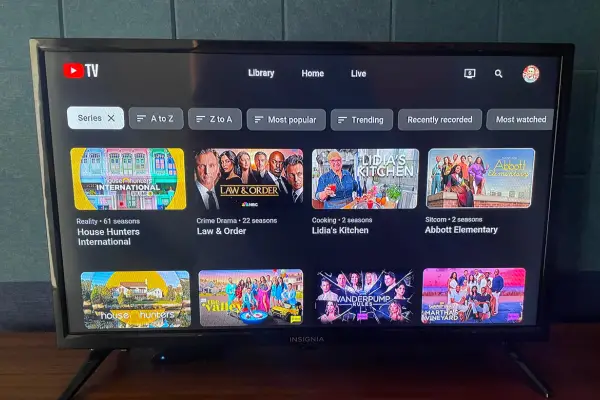
On the top of the screen in your library, “New for you” is shown in the first position. There are additional categories for recently recorded programs, most watched, scheduled and more.
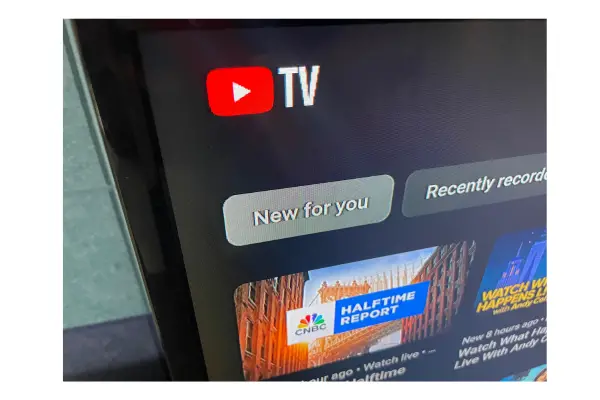
See something you’re ready to watch? Just click the thumbnail and select an episode.
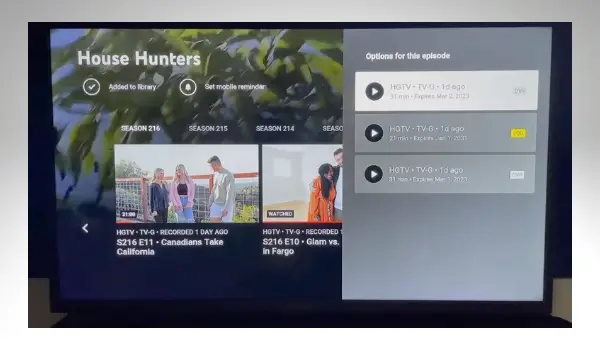
This is important: When you click on an episode, you may see two options. Always select DVR if it’s available, not VOD (Video on demand).
With DVR, you can forward through the ads. VOD has unskippable ads.
Scheduled Recordings
On the library screen, use the category tabs along the top of the screen and select Scheduled. This is where you can see programs that are being recorded right now or very soon.
If you select a program that’s being recorded right now, you can either join the program live or start from the beginning.
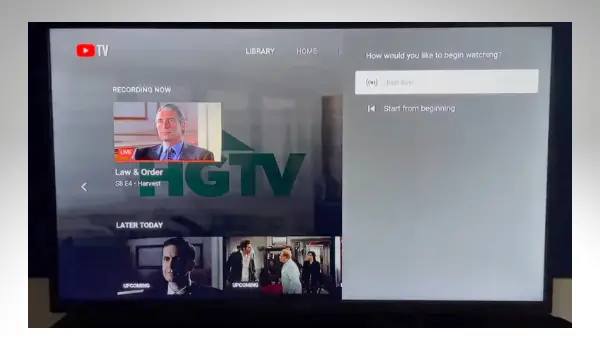
Even if you join the program live, you can always rewind to an earlier portion in the recording. Just use the keys on your remote for that.
Organizing Your Library
For some of the filters – like shows, movies and sports – YouTube TV helps you organize your DVR.
You can reorder the content in your cloud DVR by clicking on a category, such as series. At the top of the screen, you will see filters to sort your recordings.
Filters include recently recorded, alphabetical, trending and most popular.
Exit YouTube TV App on Roku
Click the home button on your Roku remote to close YouTube TV and return to the Roku home screen.
Clicking back a few times on your remote also gives you an exit option. Or from your account icon in the upper right corner, there’s an exit option toward the bottom of the list.
Be careful, though: Click exit, not sign out!
Account Settings
Some YouTube TV account settings can be changed from a TV set, but others require that you sign in at tv.youtube.com. We’ll start with what you can manage from the big screen.
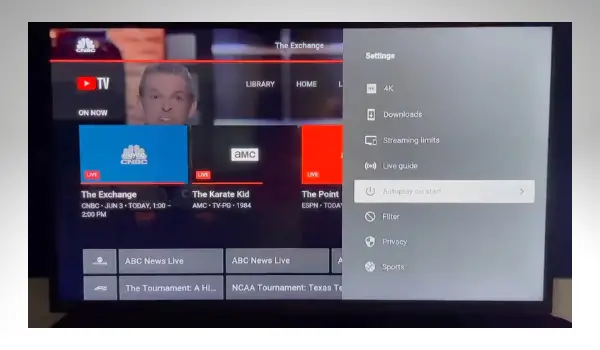
From your TV, scroll to the far right, select your account icon and click on Settings.
- Autoplay: Choose to have a top recommendation play automatically or not.
- Parental Controls: Is this account for a child? You can always adjust the filter setting if that’s the case.
- Privacy: Manage search and watch history. Choose to pause or delete your data entirely from this setting. Keep in mind, doing so will affect your recommendations going forward.
Let’s dive into a few other account settings now. Sign in at tv.youtube.com to continue.
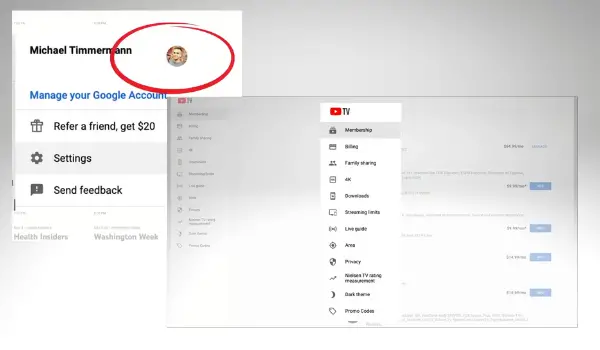
From the web browser, select your account icon in the upper right corner of the screen and tap Settings.
On the left side of the screen, you’ll see many of the settings previously mentioned and a few others.
- Membership: This is where you go to cancel YouTube TV. Select your plan and click manage. From there, you can choose to pause or cancel your YouTube TV subscription.
- Billing: The billing section is where you can change payment methods and view past charges. YouTube TV payment methods include credit and debit cards, Google Play gift card and PayPal.
- Family Sharing: The primary account holder can invite other members of the same household to share a YouTube TV membership. That way, members of the family get their own DVR and recommendations.
- Customize Live Guide: This is where you can create a custom guide that includes only your favorite channels. See my tutorial here.
- Area Section: Adjust the home and playback area if you relocate.
Contact Support
If you have a problem with your YouTube TV account, you can get help from a customer service representative.
From a web browser, click the question mark in the upper right corner and select contact us. Once you explain your issue, you’ll get contact options like phone, live chat and email.
If you’re away from a computer, you can also contact support from YouTube TV’s mobile app.
If you found this training helpful, please consider sharing it with another YouTube TV subscriber. And check out this article with more advanced YouTube TV tips and tricks.
Subscribe to Michael Saves on YouTube for ways to stretch your streaming TV dollar!

Great guide, Michael! I appreciate all the tips for getting started with YouTube TV. I found the comparison of packages really helpful, and the troubleshooting section saved me a lot of time. Looking forward to trying it out!
Very helpful in getting started. Thank you!
Dude… This is amazing…. I am “the IT department for my parents (in their 70’s) who live on a fixed income and I finally convinced them to stop paying $400/month to Xfinity/Comcast for internet and TV… They already paid for AmazonPrime but were unaware of the tv programming… Got them set up with Roku Express4k+ plug-ins for their 3 TVs, Fios Gigabit connection, YTTV, Netflix… $165/month… My brother gifted them a Paramount+ … and I added them to my AppleTV and Dis+… So now they’ll save a couple thousand dollars a year, and have more than quadrupled the amount of programming available to them. They are over the moon… mostly.
Roku’s OS is extremely intuitive and makes the learning curve fairly managable. Of the Streaming Services Apps I mentioned, they are all simple enough to push along and figure out… with the exception of the YTTV interface. I personally think they have the most robust service when it comes to matching up to traditional cable. I have no problems understanding how to use it, but even still, am able to recognize just how difficult it can be for a retired Baby Boomer to use/navigate and commit to a working memory. I get a lot of phone calls and am not available all the time.
This information, writeup, and videos are going to help out so much. So, thank you!!!
Very helpful in all categories. I had not been able to find the difference between “exit” and “sign out.” Your emphatic “do not sign out!” answered that for me. Thanks!
Thanks, I am still lost but at least there is a path to follow now. My wife and I have decided to cancel Dish since they raised cost to $151+. She is a bit anxious about streaming and learning to use this technology. Me too.